|
PROJECTS
for Stampers Season Class
in
February 2011
|
February's
Projects at-a-glance |
|
 |
|
|

|
 |

RED,
BLACK & WHITE
VALENTINE CARD

|
Project
Notes
  
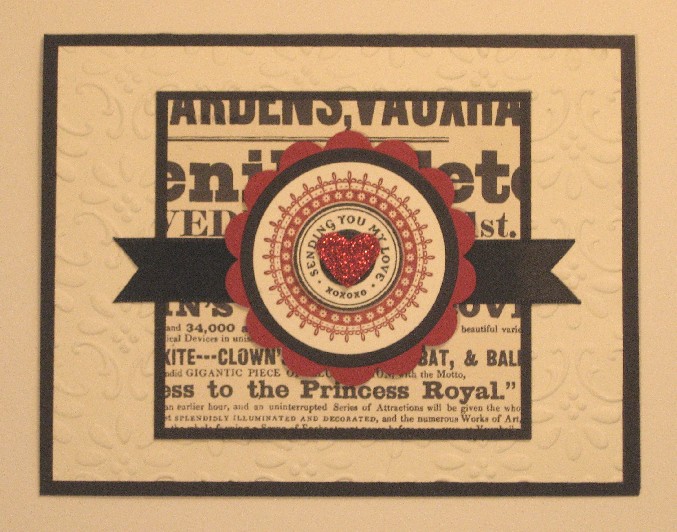
BACKGROUND PIECE:
Using the dots embossing folder or Finial Press (or whatever you
like!), impress the large cream piece. Adhere to the
 main
black card base by putting adhesive on the black, leaving a narrow
margin all the way around, since the white piece is a little smaller
than the black. main
black card base by putting adhesive on the black, leaving a narrow
margin all the way around, since the white piece is a little smaller
than the black.
NEWSPRINT DP:
Adhere this to the black piece, and adhere this to the cream
piece. (Whenever adhering anything to something that's been
embossed, you want to use a generous amount of adhesive, especially
if using snail-type adhesive, as there is less area that will accept adherence.

RIBBON:
Cut the two edges of the black satin ribbon as shown above.
(Fold together evenly, cut both thicknesses from outer edges toward
center of ribbon at about a 45 degree angle.) Adhere to DP
piece with adhesive just in the center third of the ribbon.
CIRCLE PIECE:
As you can see looking at both cards, you can use any circle
images you might have, that fit inside circle punches you might
have, and just go back and forth on the colors. Like in mine,
I have the red (Cherry Cobbler) scallop circle, a black circle, the
circle image (from "Boho Backgrounds") stamped in Cherry Cobbler, a
black stamped image (from "Circle of Friendship") with a black 1/2"
circle, and a punched red heart (in what I call the
"imbedded-glitter DP")! ... But that said, ANY circly
images you have will work! You just need to match up the
right-sized circle punches to them.
INSIDE CARD:
Because the card base is black, you'll want to put a piece of
cream inside. (I like to do a Top Note piece.)
VERSATILITY:
You could do this for a wedding or anniversary instead, using a
different circle sentiment. Or do a punched flower in the
middle instead of the heart, and it could be for a birthday or thank
you!
PROTOTYPE:
Here (below) is the prototype. The actual color of the card is
about half-way between this card and the card above!
Not as white as this, but not as dark as mine (above) is... Cream.

|

FAUX
PRESSED FLOWERS
CARD

|
Project
Notes
  
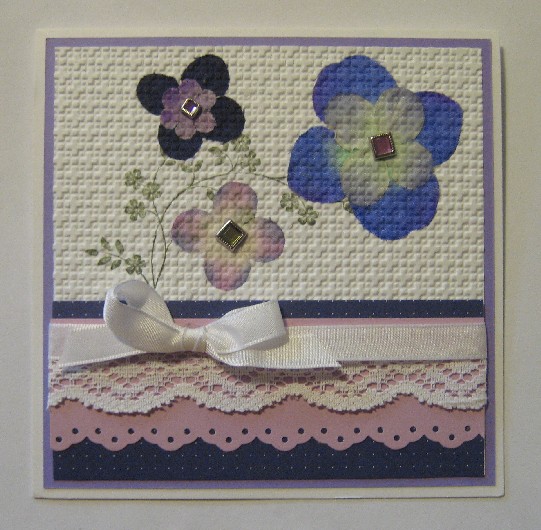
BACKGROUND
+ FAUX PRESSED FLOWERS:
1) Stamp the
floral/leafy image onto the large white piece in Always Artichoke,
allowing room for your flowers.

2) Remove any
plastic (or other type of) centers from your silk flowers, arrange
along the leafy image, and then thoroughly glue them on.
3) Emboss
all this in the Square Lattice embossing folder. If you
 used
glue stick, then your flower may stick to the indents in
the embossing folder
just as waffles tend to stick to the indents in the waffle iron.
So be careful, as you open up the embossing folder, to pry the
flowers off using a piercing tool. (For some reason, we didn't
try using snail adhesive; not sure why. You could certainly
try it.) used
glue stick, then your flower may stick to the indents in
the embossing folder
just as waffles tend to stick to the indents in the waffle iron.
So be careful, as you open up the embossing folder, to pry the
flowers off using a piercing tool. (For some reason, we didn't
try using snail adhesive; not sure why. You could certainly
try it.)
4) Glue this
whole piece to the large square lavender piece.
5) After the
flowers have dried for a bit (do the lower-third piece while the
flowers dry), apply gem brads to the flowers by using the paper
piercing tool (on
the thick pad that goes with it),
to pierce long holes, about 3 holes wide, to accommodate the long
prong of the brad. This will go through the flowers, the white
background piece and the lavender piece. You can use stick-on
gems, but the brads actually help keep this together.
LACEY LOWER THIRD
PIECE:
1) Punch the
lower edge of the lavender piece.
2)
Glue this onto the
larger, darker purple piece (or whatever colors of pieces you have
in your kit)
3) Glue the lace
onto ~ and around ~ this piece. You'll want adhesive (glue
stick or snail) to be pretty thoroughly applied so that the ribbon
will have a sturdy base.
4) Now apply the
ribbon. (I don't remember what's in the kits, but I believe
you have two pieces, right? If so, one of them is about
an inch wider than the piece you're applying it to; glue that one
on, attaching it first on the back of one side, then bringing it
around to the front and attaching it to the lace under where the bow
will go, then attaching it to the back of the other side.)
5) Tie a bow out
of the other piece of ribbon, and apply it with a glue dot.
(If you want it to be more stable, and not turn, use two glue dots.)
MORE SAMPLES!!!
Here are cards made by the gals in the class!!


PROTOTYPE:
And last but not least, here's the prototype from which I got
the idea!! Very pretty, but I wanted to use a lavender/purple
color scheme instead. Plus
I didn't have the lace or lace punch, or the same background paper,
nor did I want to use twine or raffia. They're pretty here,
but just wanted a different look.

|

STAMPED-OFF
BUTTERFLY
CARD

|
Project
Notes
  
CARD BASE:
White CS, cut at the usual 5.5" (by 4.25") and scored at 4.25"
DP
BACKGROUND: Use any designer paper for the background,
which is cut at 4" X 5-1/4". Adhere now. (Nothing
else needs to be attached before it goes on.)
WHITE PIECE:
This is about 2 inches high by 5.5" wide. Punch the edge with the
Scallop edge punch.
BUTTERFLIES:
I used the butterfly in "Punched Posies," but there are others
you could use instead, or you could even stamp a flower, a leaf,
baby booties, teddy bear, a high heel... anything you have
that you can find coordinating DP for! ... Stamp your first
image on the left side, then, without re-inking-up, stamp the middle
image, then the right image.
However, you might find it easier to keep the tops of the
butterflies even with the top of the white piece by doing turning
the white piece up-side-down (not over) so that the top of
the white piece and the butterflies are closer to you, and you can
see more easily where the butterflies are being placed on the white
piece. If you do this, though, you need to remember to start
on the RIGHT side, since the whole piece is now up-side-down!
MY "OOPSPORTUNITY"!
I'm sure you noticed that there's a full-strength (first
impression) "flourish" (from the
"Priceless" stamp set) over the middle butterfly. This is NOT
because it actually needs it, but because I messed up and had
to disguise my blemish with "something"! I greatly prefer it simpler,
as in the prototype below. But some of the gals liked my
addition, and added a flourish to theirs anyway!!!

SENTIMENT:
Find a sentiment that fits nicely onto your last ~ most faint ~
butterfly. I stamped in black for the greatest contrast.
PUNCHED FLOWER:
First stamp a floral image ~ compatible with the 5-Petal Flower
Punch (I used the 5-petal flower in "Punched Posies"), if you want
to do it like mine ~
onto white CS, and then punch it out ~ with the punch up-side-down,
of course, so you can see where you're punching.
LEAVES:
Punch two of the wings from the bird punch to use as leaves.
(Cool, huh!?!?)
PROTOTYPE:
Here is the original:

This is a different
butterfly stamp,
"Butterfly Prints"
(page 107), which I like, but don't have.
The artist stamped the sentiment over the faintest butterfly in the
same color, full-strength,
but I wanted more contrast, so I used black ink instead. I
also really like the silk flower with the gem brad center! But
we've used silk flowers recently (this class, even!), and I wanted
to use a stamp + punch that I've never used, and thought this would
be a good place to do so!
|

BIG
FLOWER
CARD

|
Project
Notes
  
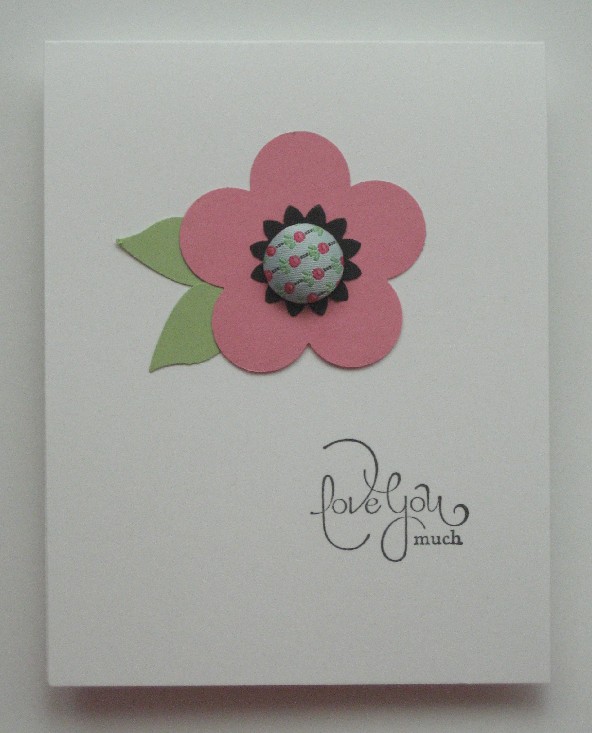
CARD BASE:
Isn't this card just SO pretty and simple?!?!!? ...
This can be cut
either "hot dog style" or "hamburger style." Since no ribbon
is being used, it works equally well either way.
FLOWER:
Punch a big flower using the Fancy Flower punch. Then apply a
covered Fabric Designer Brad to the center. I added on a punched flower
from the Boho Blossoms punch to add a little more interest.
(This isn't
actually "needed"; just a fun touch.)
3
OPTIONS FOR THE
FLOWER:
1)
You could use the coordinating flower stamp in "With All My Heart"
(page 47 of the 2010-11
Idea Book and Catalog)
to first stamp your flower, and then add the same center as above.
2) Or you could
use the "For You Flower" stamp to first stamp the flower, and then
punch it out, and not even need to do a center of any kind as it
already has one ~ the words "for you" all over the center circle!
(It's on
page 19 of the big catalog.)
3)
Or you could use the large flower stamp in "Punched
Posies."
LEAVES:
Punch two of the wings from the Two-Step Bird Punch to use as leaves.
SENTIMENT:
Any sentiment you have that will fit here will work very nicely!
You can do it in black as I did, or in a color that matches the
flower!
PROTOTYPE:
Here is the original card... in which she used a clear button with punched
circle behind it for the flower center, and added a grosgrain ribbon
tie. I like
this too! It's very "clear and fresh" ~ but I just wanted to use my new covered fabric
buttons!!! 

(To my
stampers: You
have TWO
kits for this
same card, in two different
designs, as it
is SOOO simple!
|

|


 main
black card base by putting adhesive on the black, leaving a narrow
margin all the way around, since the white piece is a little smaller
than the black.


